Adding an Audio Jack to your NuTone Music Intercom Master Station
 Monday, July 22, 2013 at 8:38AM
 One of the most common and useful additions to any NuTone Music Intercom Master Station is a modern 1/8" (3.5mm) Audio Jack.
The 1/8" audio jack is the most common size used today for modern audio devices. It looks just like the ear bud jack on your MP3 player of smart phone.
When this type of jack is mounted to your NuTone Intercom master station, you can connect almost any type of external music source to play throughout your music intercom system. This includes portable or table-top CD players, and almost all MP3 players including iPods and iPads. You can also connect your smart phone to the system.
There are a few considerations to make this type of connection work correctly. All of the modern devices I mentioned are Stereo Music Devices (they all have both right and left channel audio). Your NuTone Music Intercom System is a Mono System (the right and left channel audio are combined into one channel).
To have both channels of your stereo source play through the intercom system together, the audio jack has to be wired to mix the channels inside the jack. There isn't any off-the-shelf kit that will have this setup, but it's easy to make from commonly available parts.
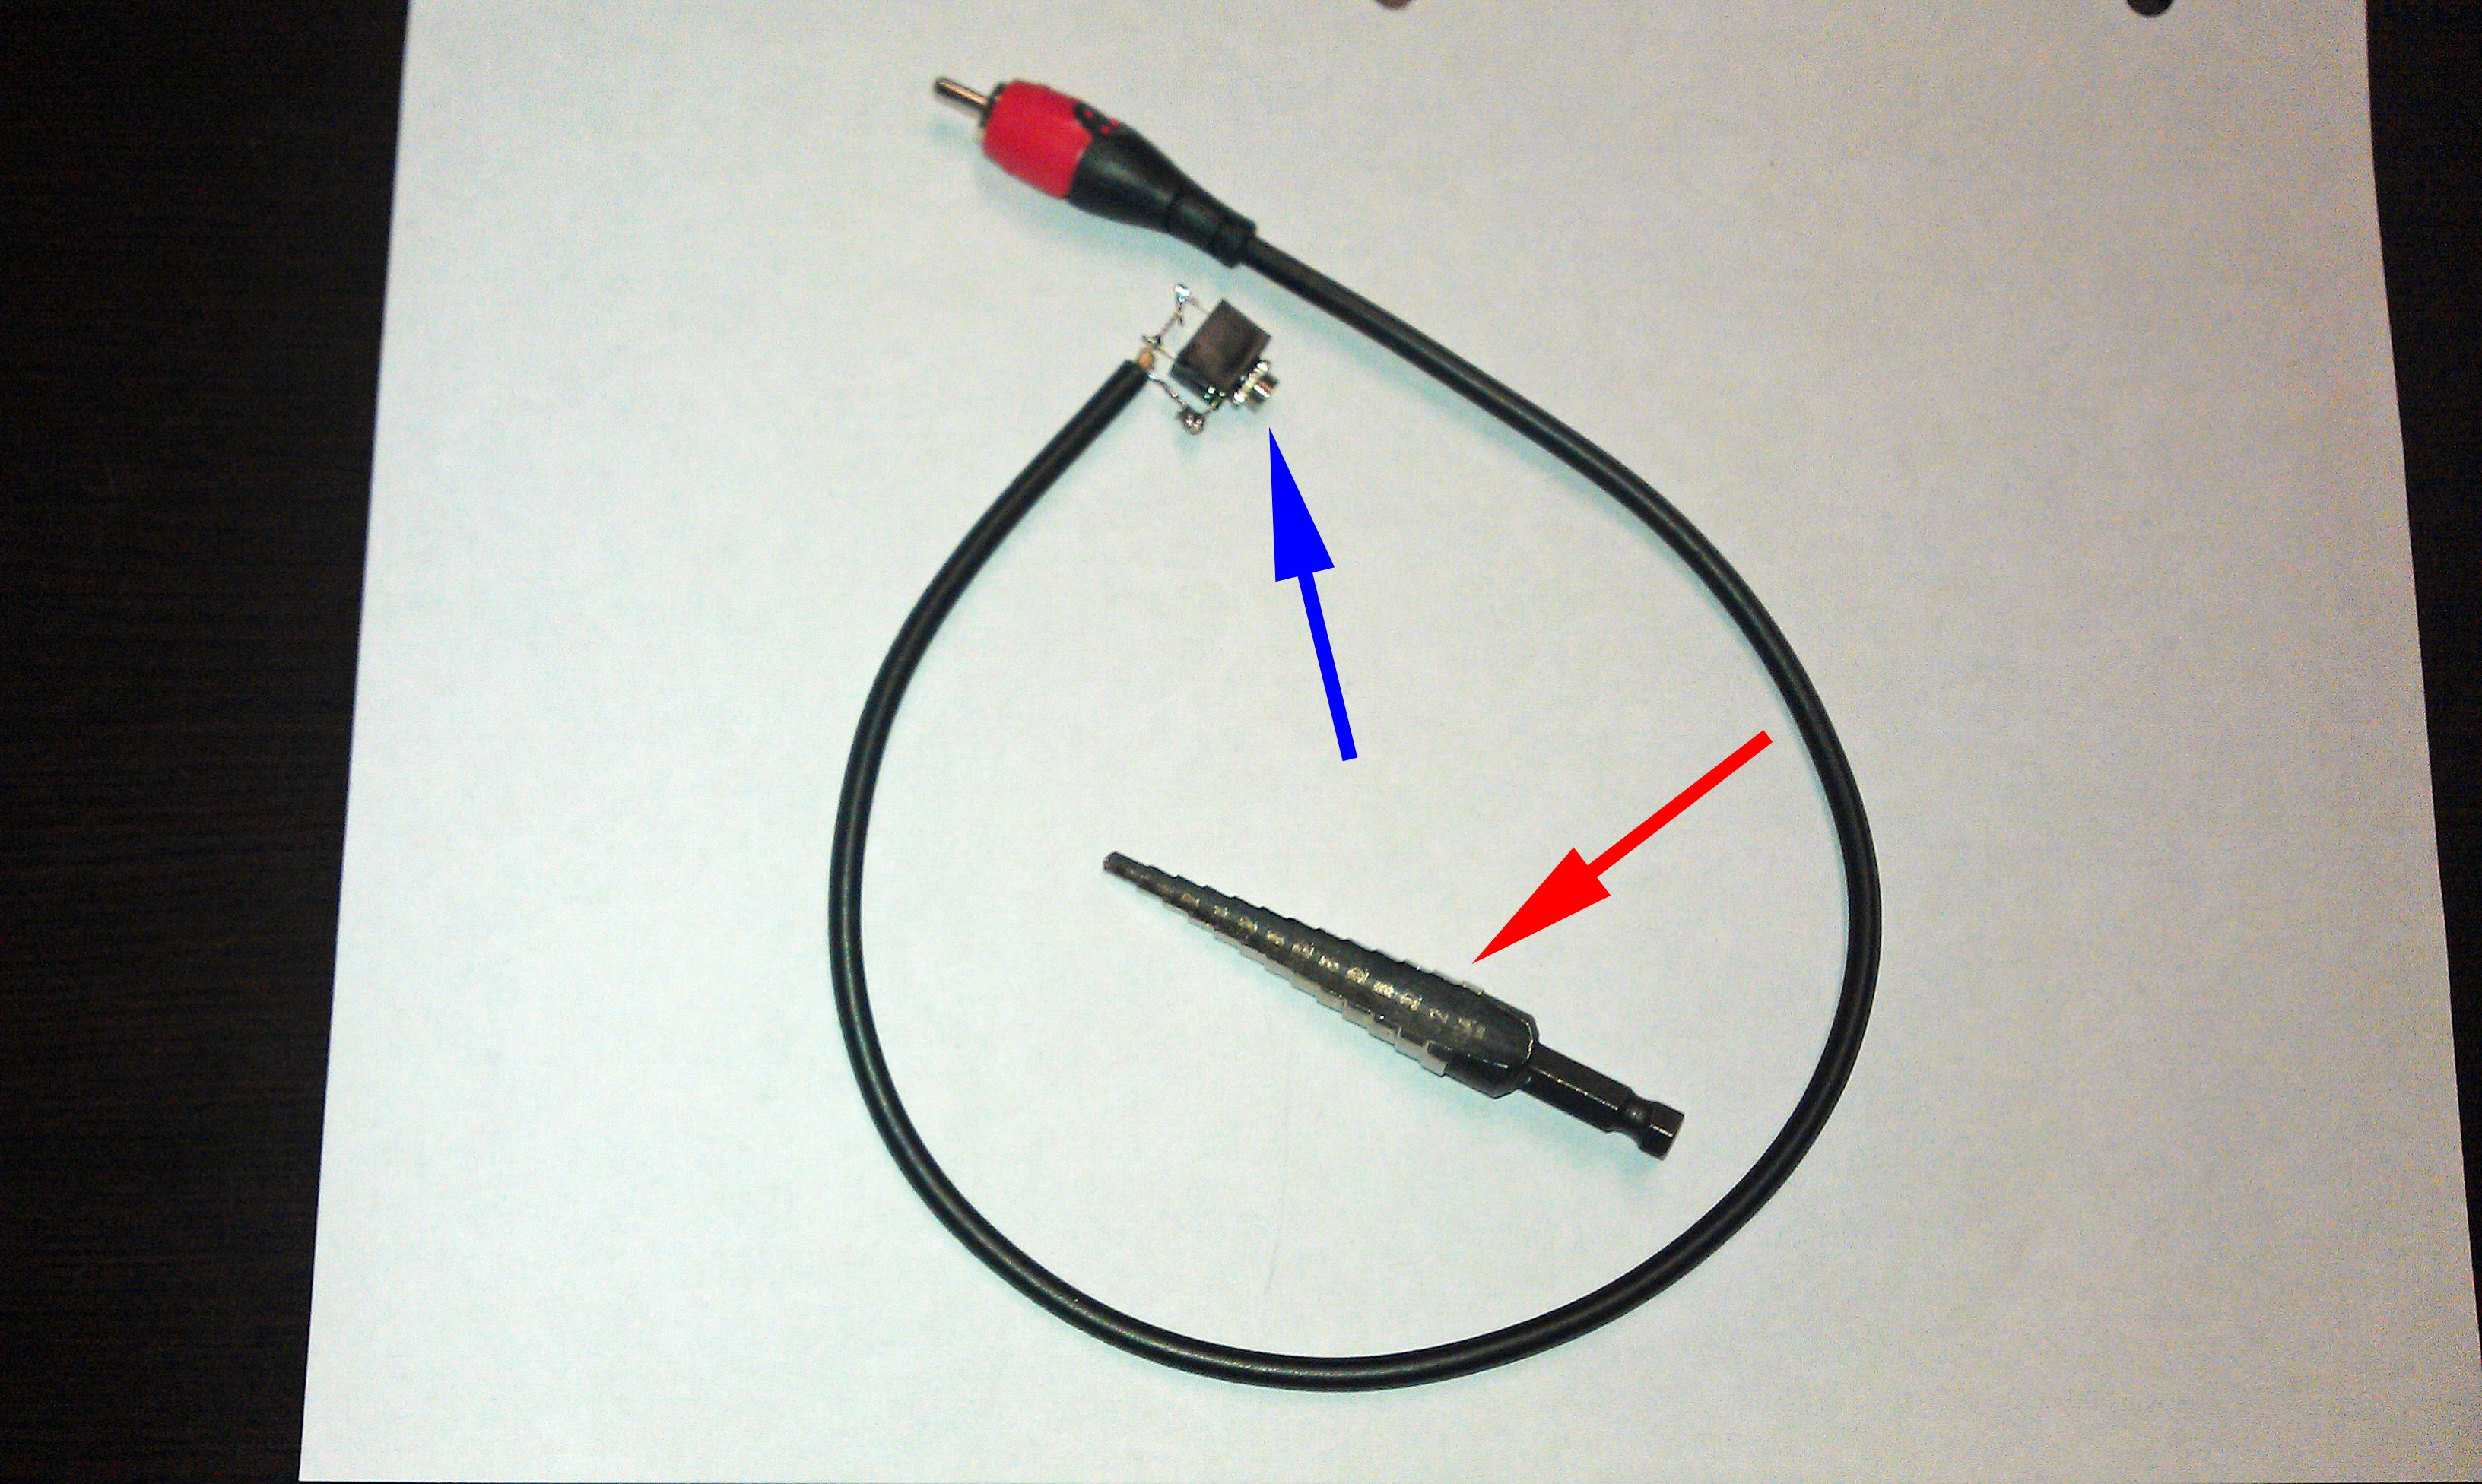
I sourced all of the parts from my local Radio Shack (every town has a Radio Shack) and the drill bit from my local Home Depot (again, everyone goes to Home Depot).
You will need two items from Radio Shack:
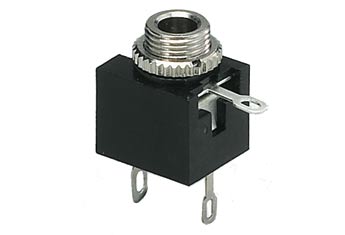
1) 1/8: Stereo Panel Mount Audio Jack Model 274-249
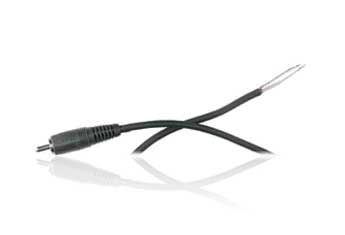
1) 6-Ft. Shielded Cable, RCA Plug to Tinned Wires Model 42-2371
And from Home Depot (or another hardware store):
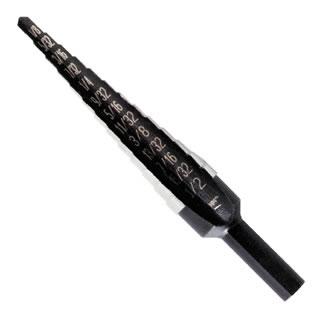
1) Irwin High Speed Steel Fractional Self-Starting UNIBIT Model 10231.
To make up the Audio Jack and Cable, soldering is required. For those of you who don't solder, ask a friend who does to help you.
The Audio Cable has two wires inside of it; the center wire is the Audio (positive) and the outer wire is the Ground (negative).
The Audio Jack has 3 connections on it (solder lugs); the 2 lugs on the back of the Jack are the Right and Left Channel (stereo) connections and the single lug at the top is the Ground (just one ground for both right and left channel is required).
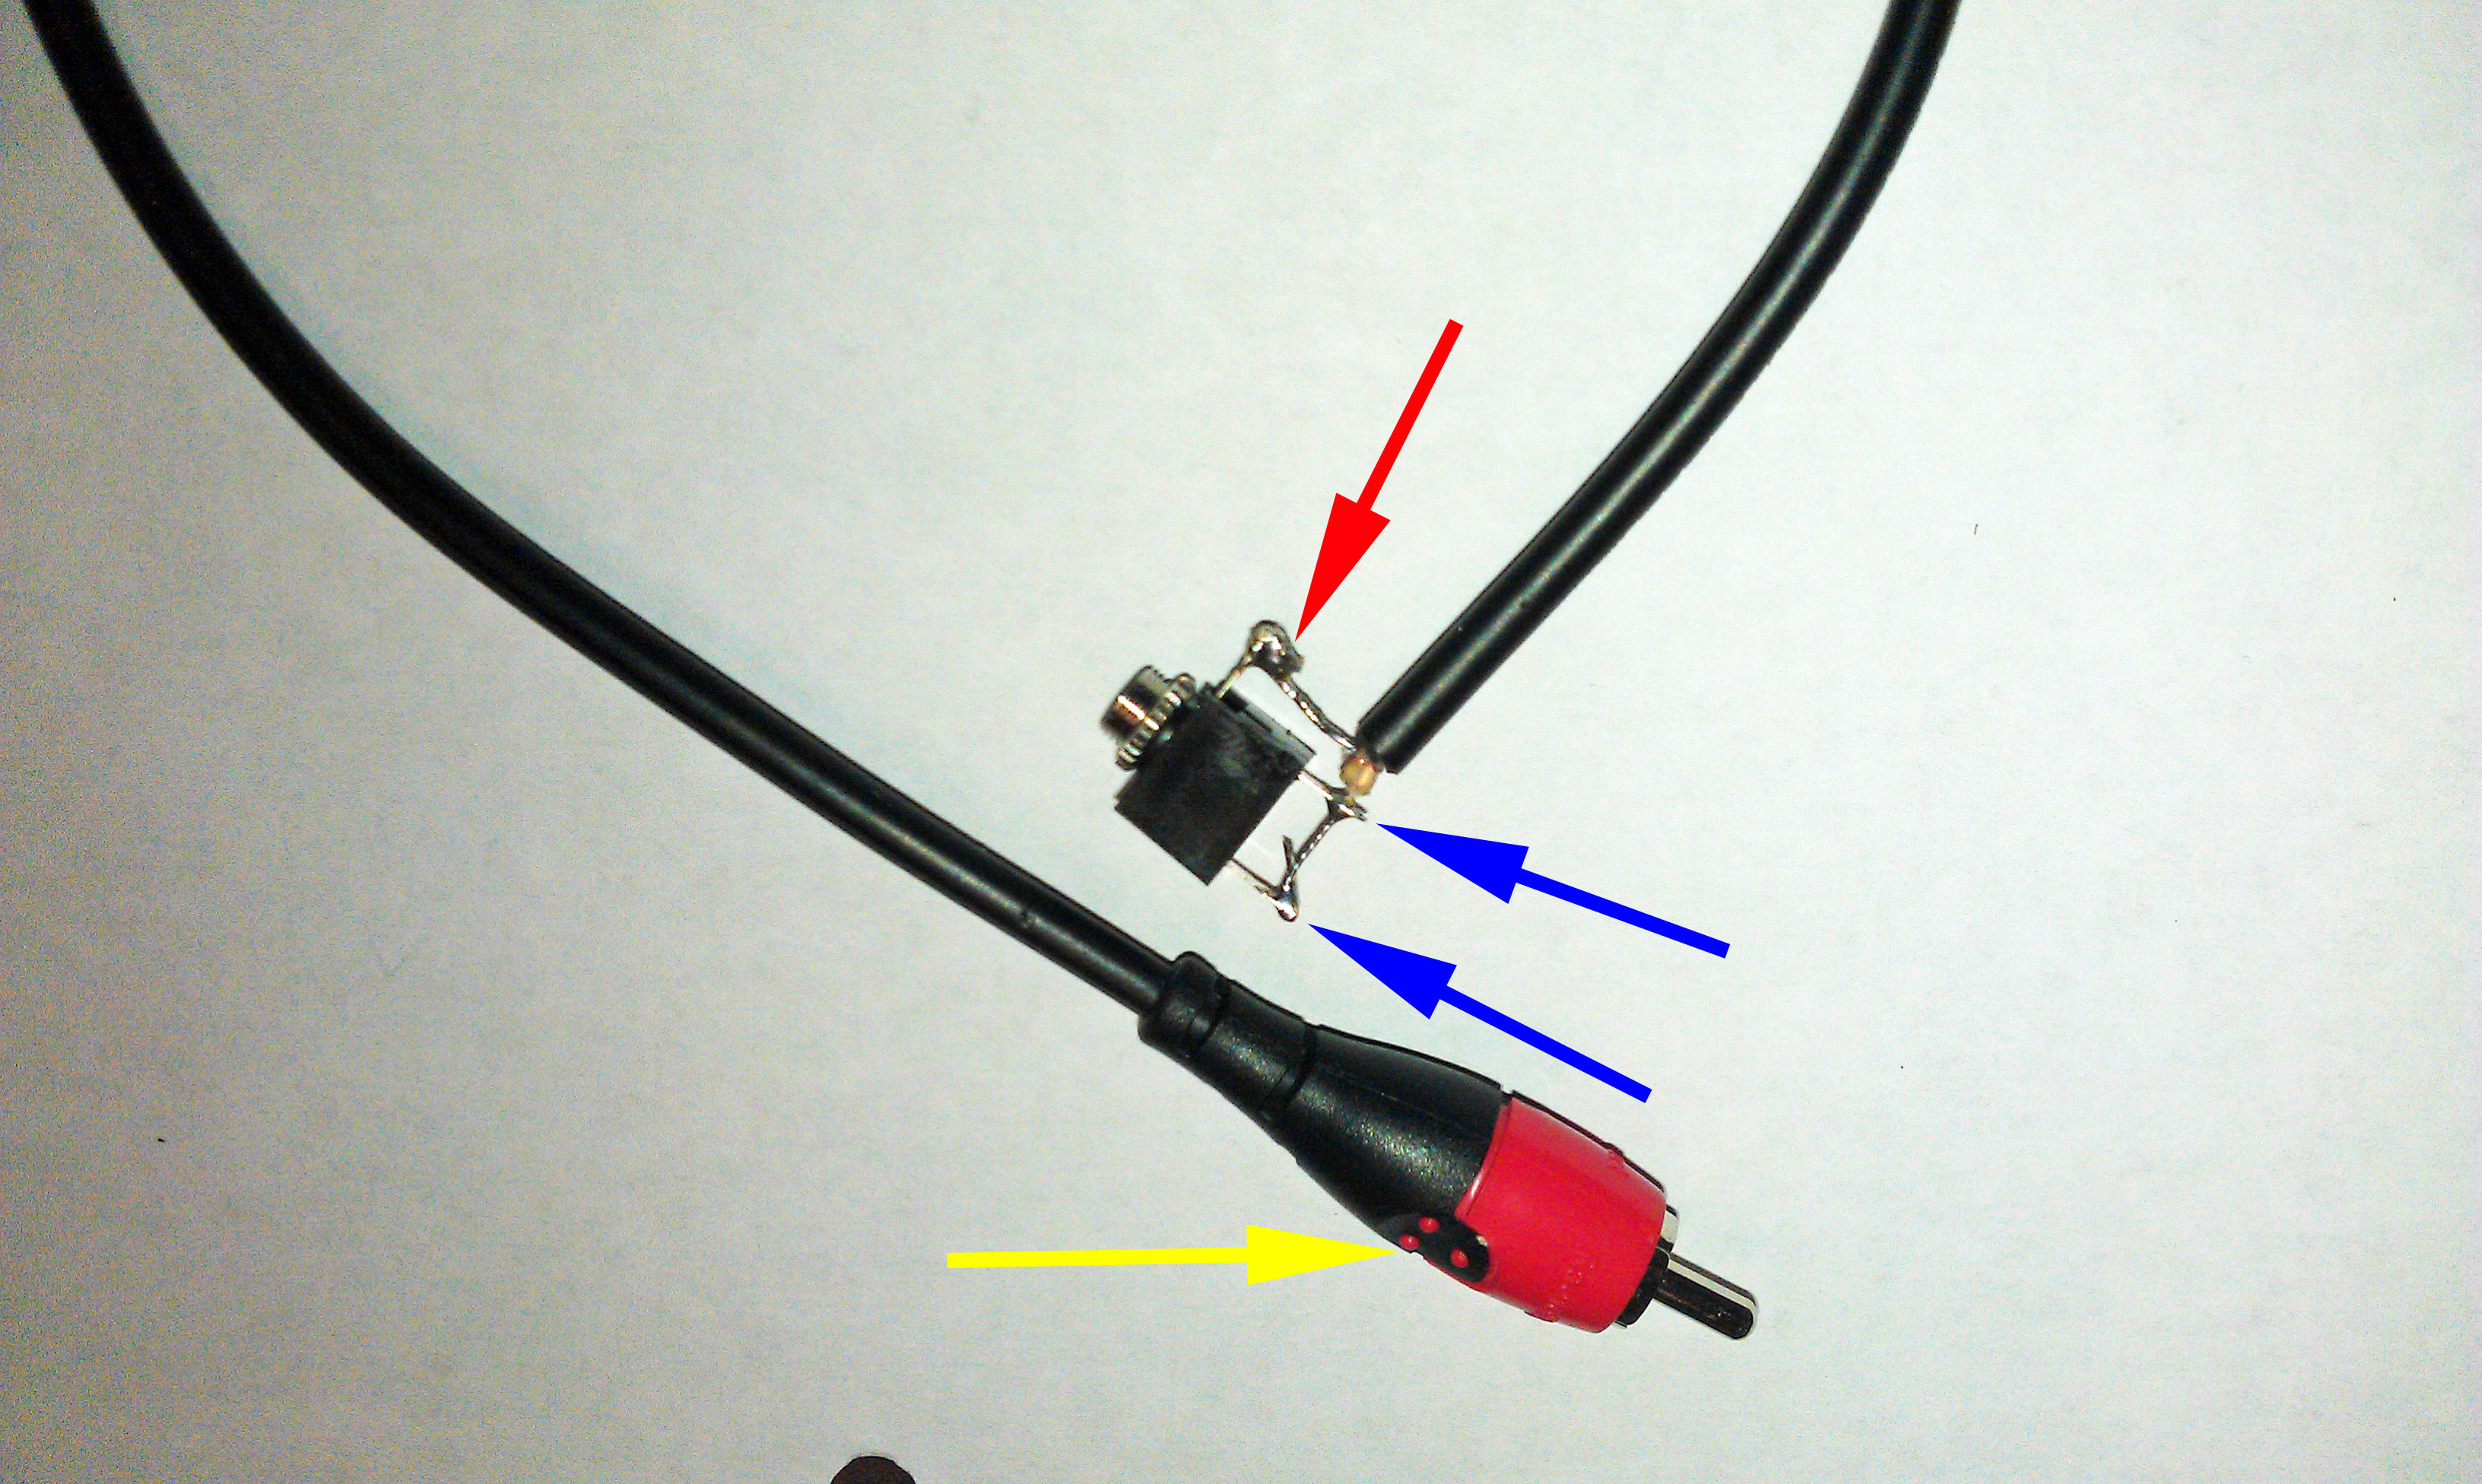
(Red arrow is the Ground connection, Blue arrows are the Center wire connection, Yellow arrow is the RCS plug)
Turning the Stereo Jack into a Mono Jack is easy. Use the Center Wire in the Audio cable and solder it to the 2 lugs on the back of the jack (now right and left channels are mixed together). Then, solder the Outer wire from the cable to the single ground lug. Your 1/8" jack is now complete and ready to be installed in the NuTone Master Station.
Now it's time to consider where on your NuTone Master Station the jack should be mounted. I usually choose the side or the bottom of the Master Station's Faceplate to mount the jack.
You will also need to look at the layout of the circuit boards on the back of the faceplate to find an area that has enough room to mount the jack easily.
The reason I choose to use the Irwin Unibit to drill the hole is because it will cut a very clean, round hole for the jack, it's easy to control the size of the hole and because conventional twist drill bits can grab the plastic of the faceplate and pull themselves in too fast. This type of out-of-control drilling can cause the drill bit to hit a circuit board and RUIN IT (You have now been warned!)
Drill the hole, mount the 1/8" Audio Jack to the faceplate and plug the RCA Connector on the end of the Audio Cable into one of the Auxiliary Input connections on the back of the Intercom Master Station.
Most models have at least 2 inputs jacks to choose from. Select the AUX or TAPE jacks. Do not use the PHONO jack.
Now you are ready to listen to music from your own audio device. Use a 1/8" to 1/8" Stereo Plug Cable (what ever length works best for your installation) to connect your music device (iPod) to the Master Station.
You might find that even with volume turned all the way up on your music device (iPod), the sound level from the Intercom System is lower than when you listen to the Radio. This is typical for some music devices. Use the "System Volume" or "Program Volume" adjustment on your Master Station to compensate for the difference in volume.
If there is enough interest with our readers for this Audio Jack, I will consider offering it as a pre-made item for sale.
Please let me know what you think!
 Use this Button to Contact Us about Ordering a Pre-Made Auxiliary Input Jack Assembly
 Cindy & Christopher
I've had many people ask for a step-by-step on how to install the Audio Jack in their Intercom Master Station. I've choosen a IM3003 for my example, the steps wil be similar for most other models. An important consideration on where the Audio Jack is mounted is to make sure you have enough room for the Audio Jack and that you can drill the hole without drilling into a circuit board.
On a IM3003 the best place to mount the Audio Jack is the lower right-hand edge of the face plate. There is plenty of room for the jack, the tuner circuit board is easy to move out of the way to do the work and it is a convienant location to plug an audio cable into.
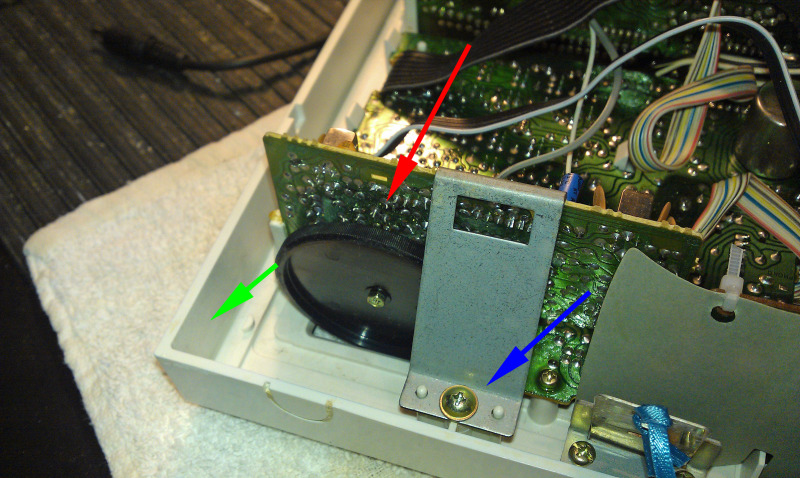
The Tuner Circuit Board is held in place with a mounting bracket that is held to the back of the face plate with a single screw. (red arrow is the tuner board, blue arrow is the retaining bracket, green arrow is where the Audio jack will be mounted)
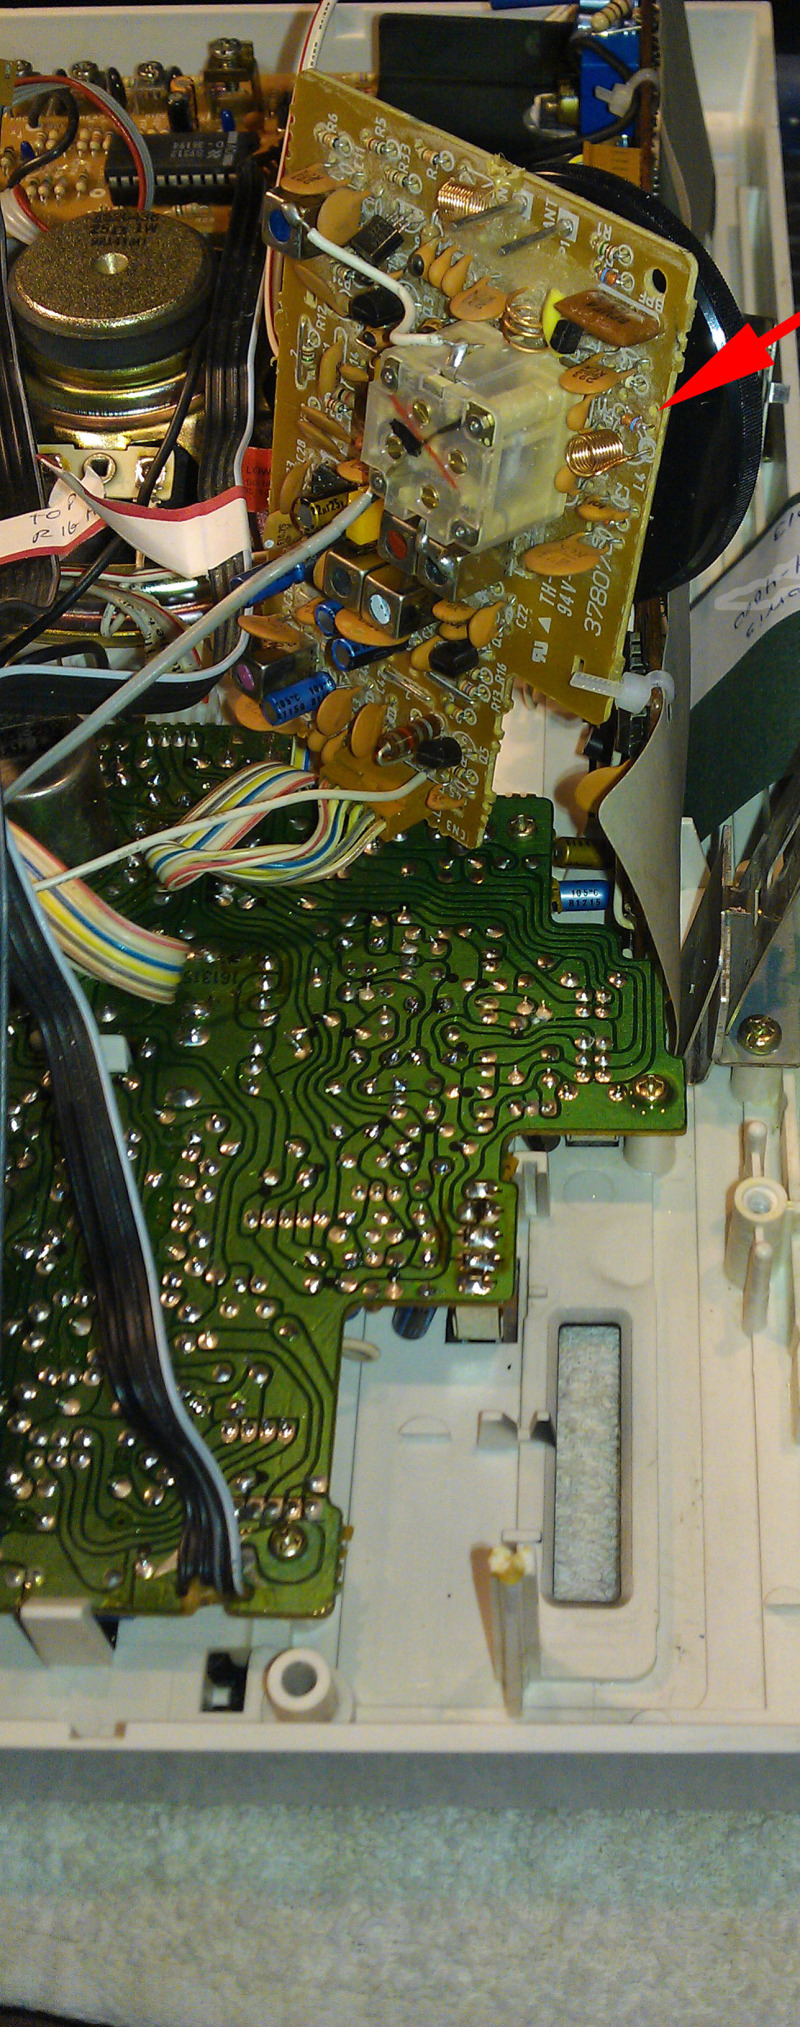
Remove the screw and slide the Tuner Board out of its retaining slots, place the Tuner Board out of the
way.
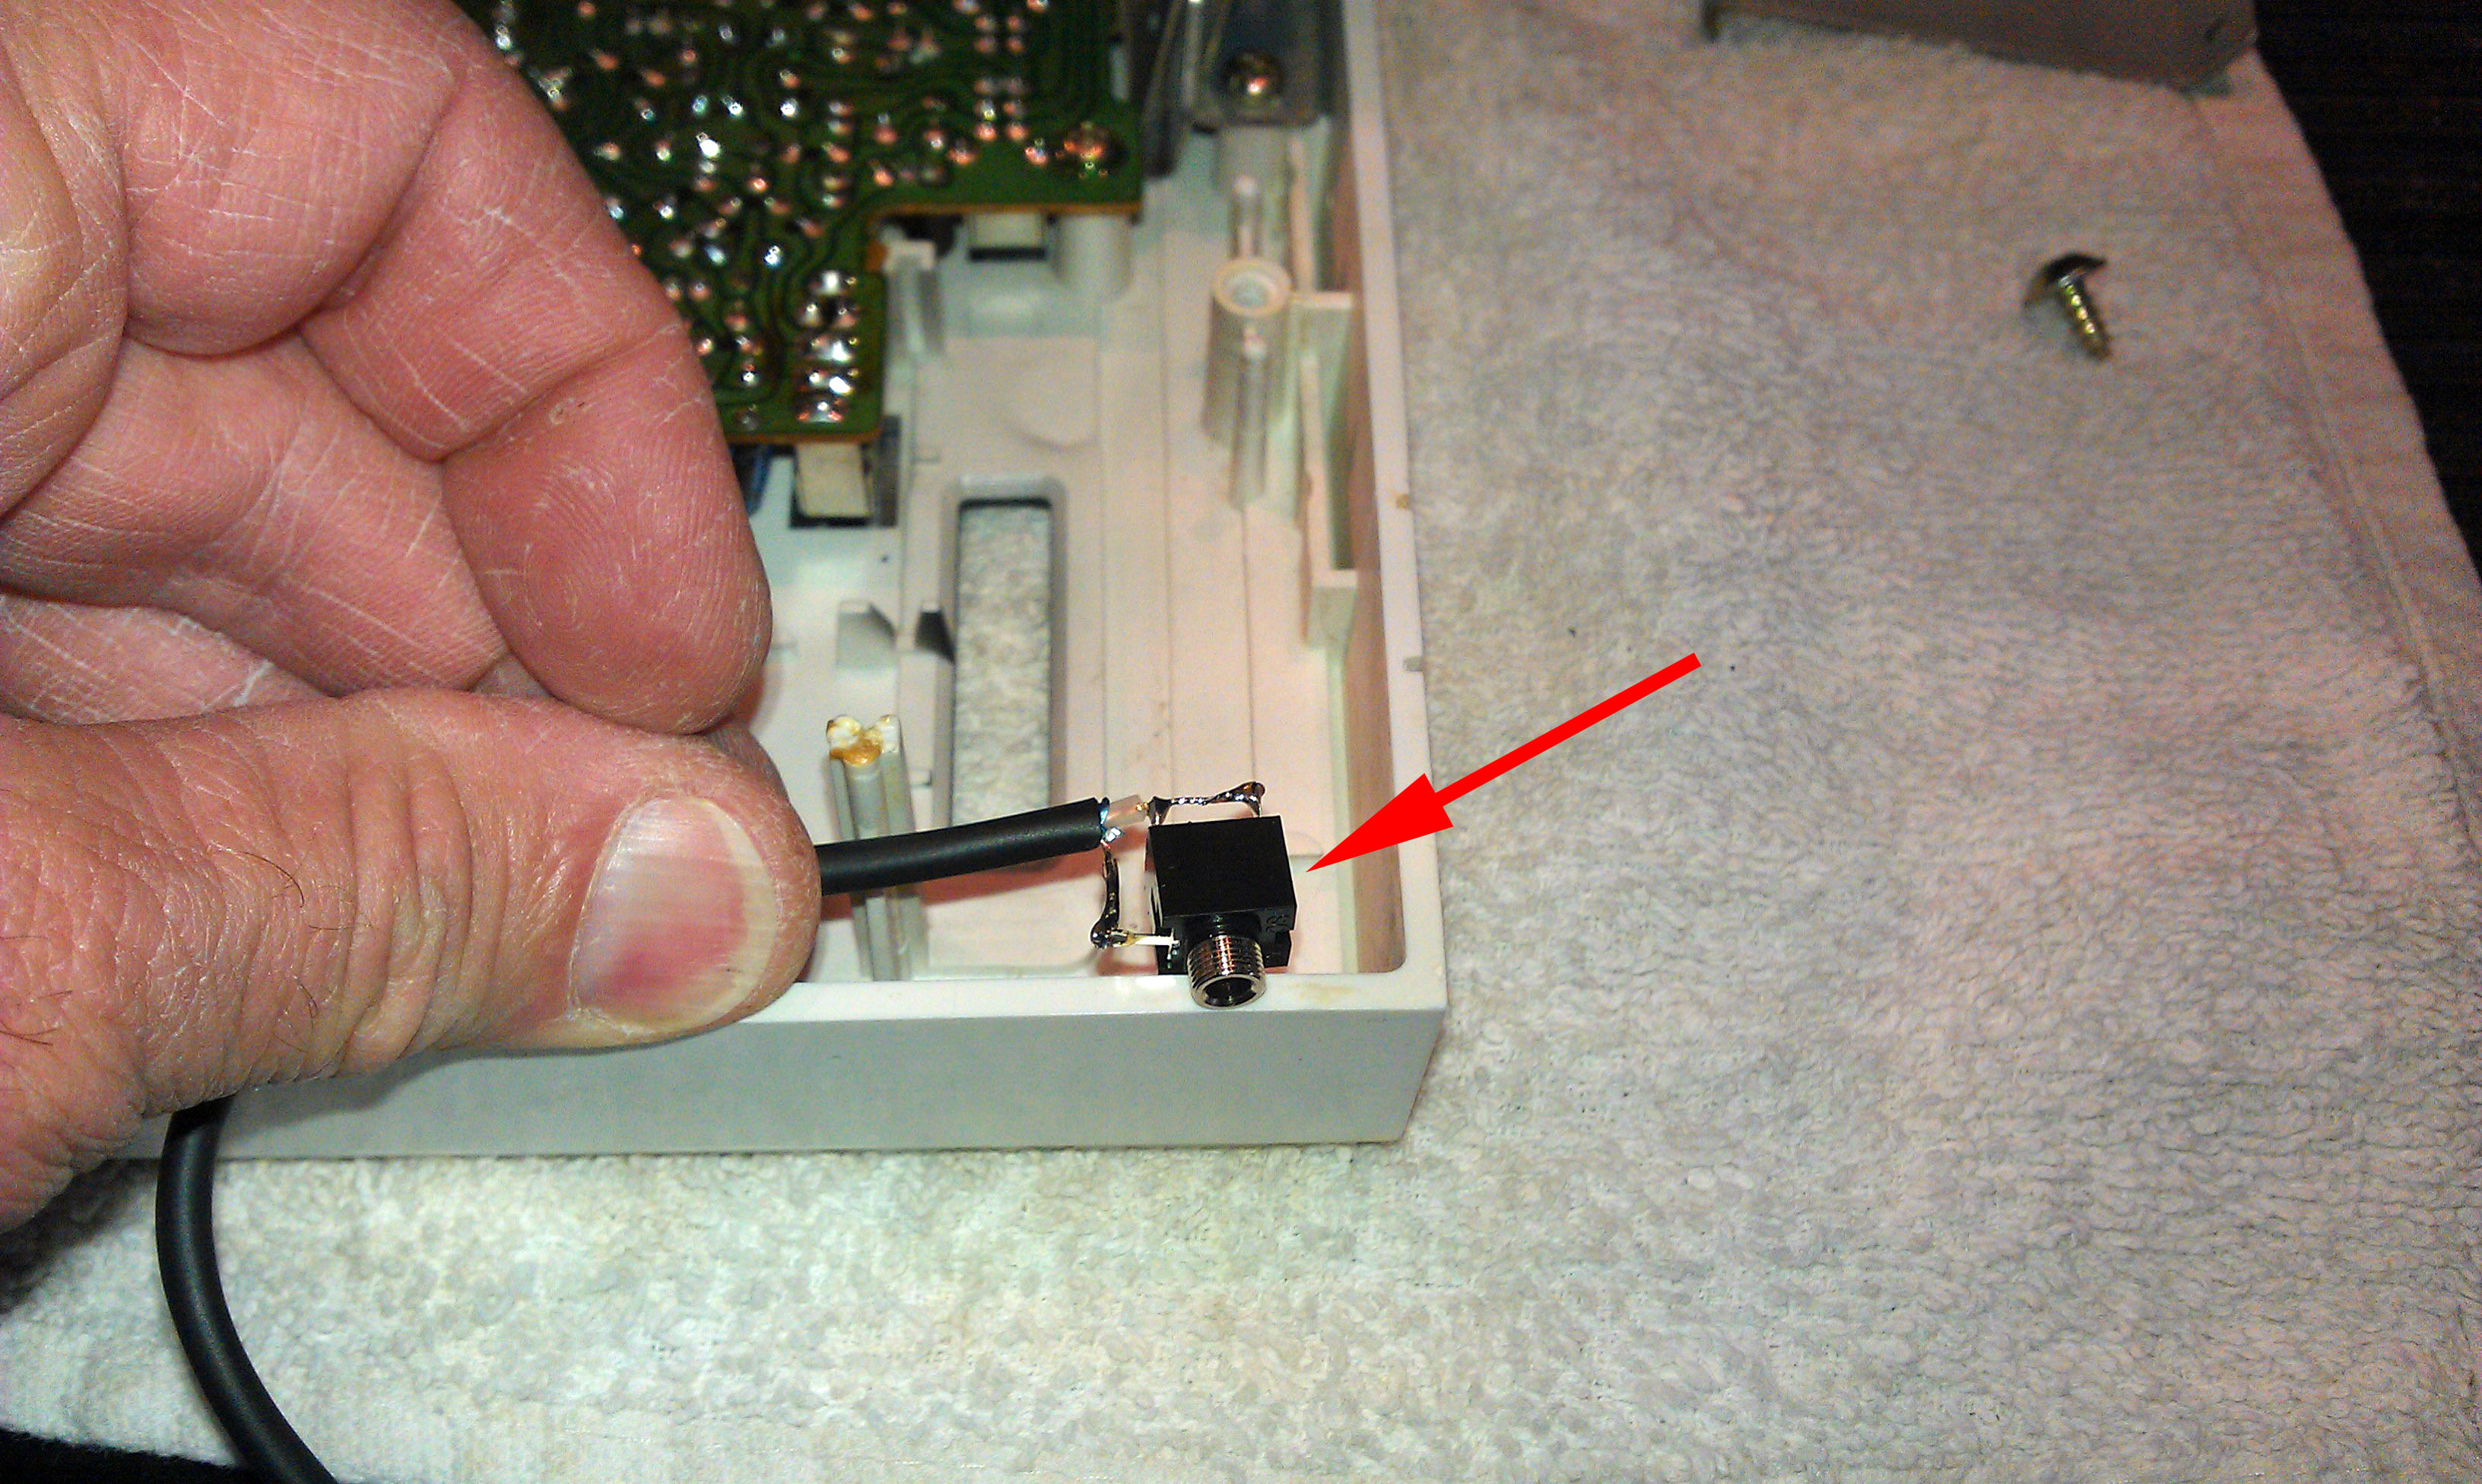
The depth of the IM3003 face plate is generious, so placing the Audio Jack is easy, just make sure you alow enough room around the jack do it will fit into the space properly.
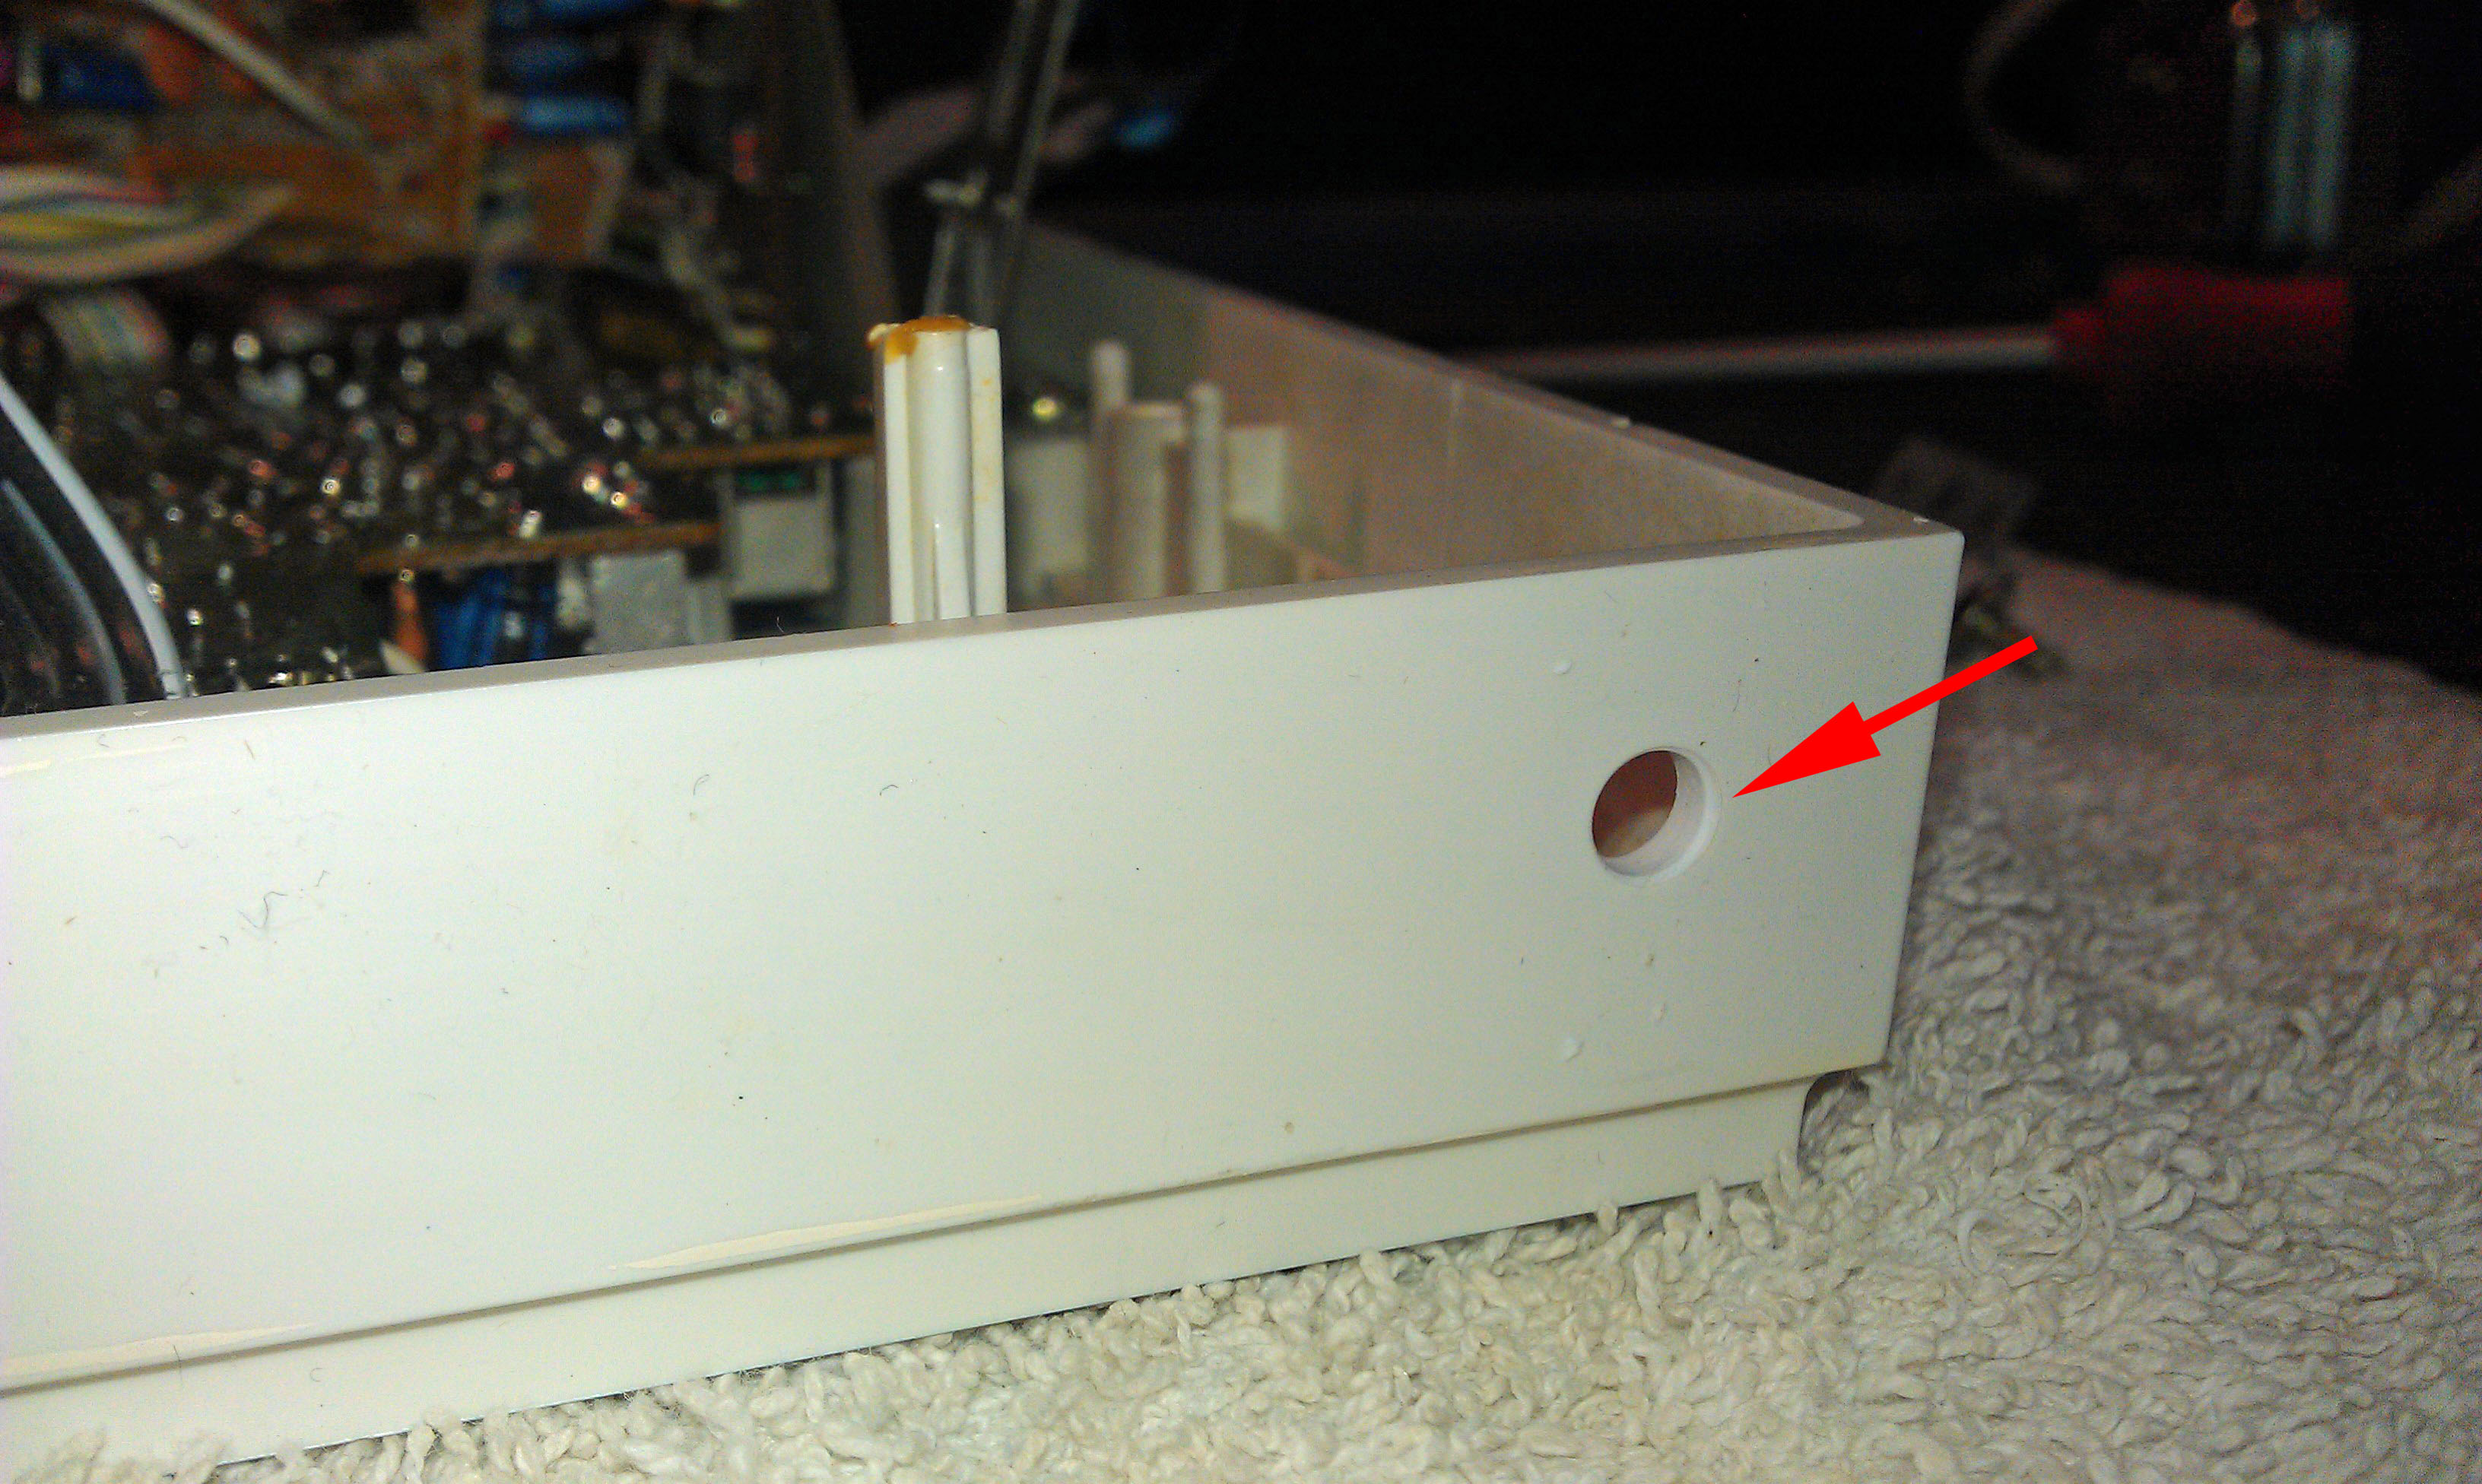
Use a Unibit and drill the hole in the face place.
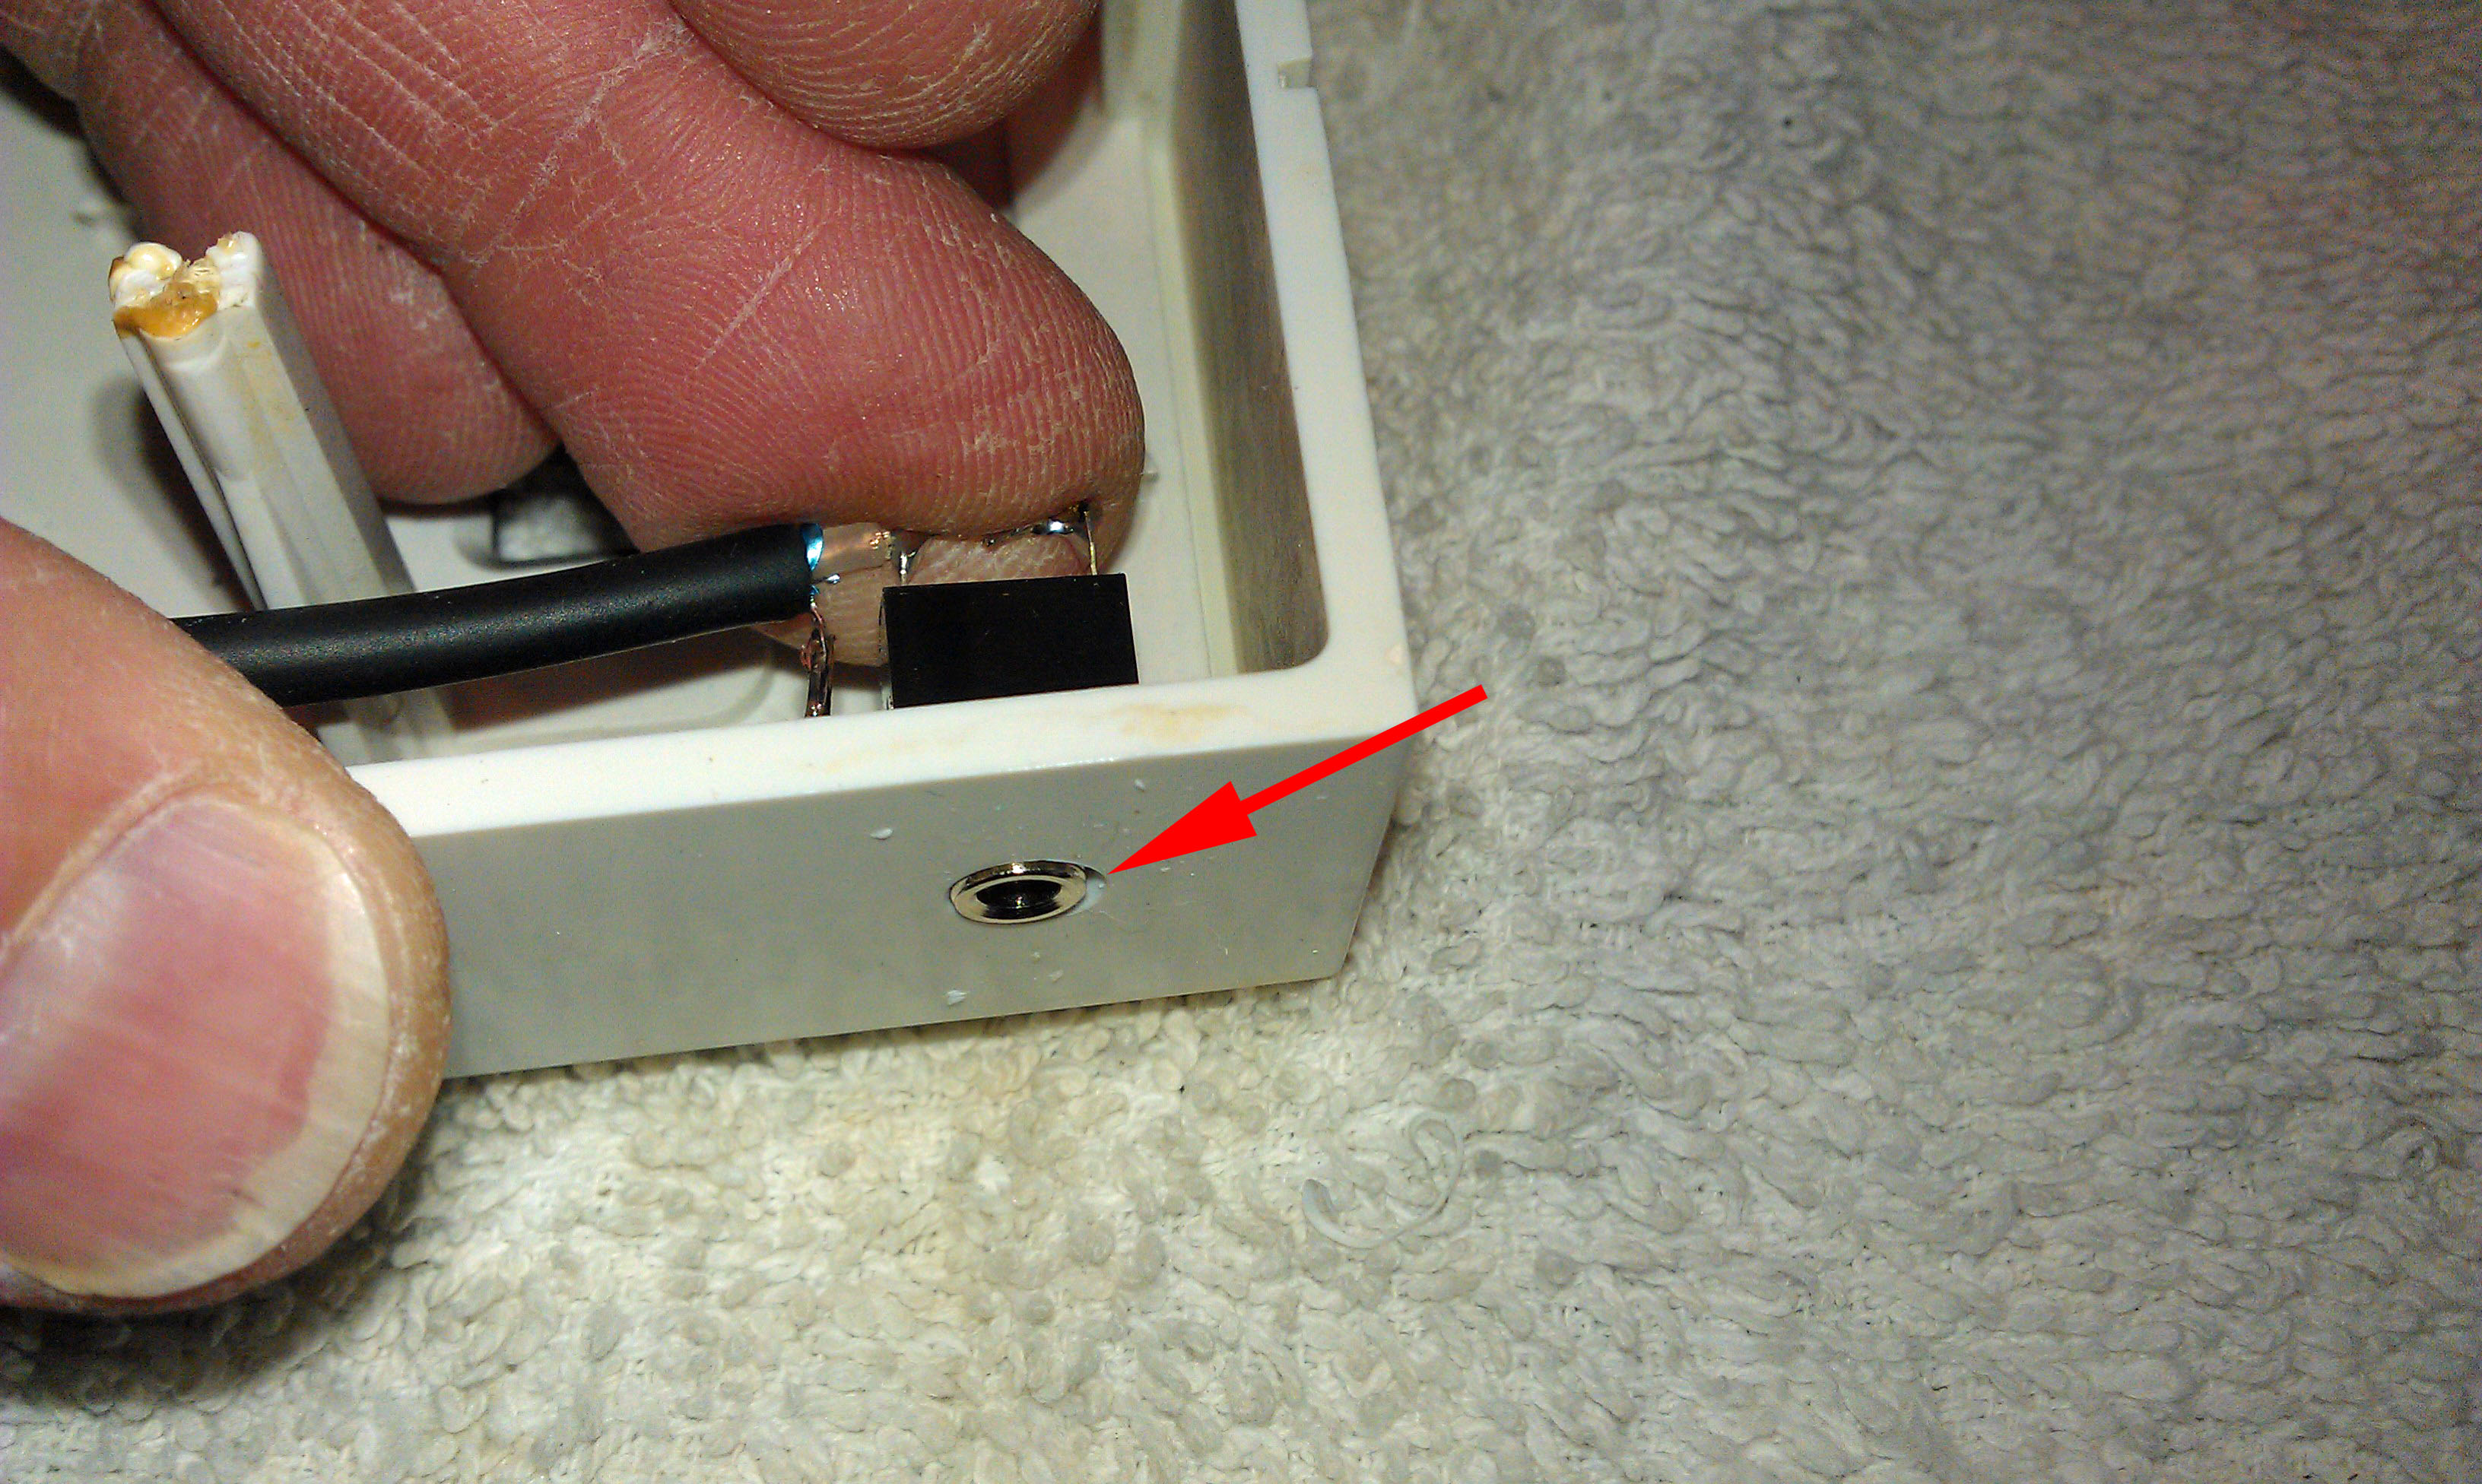
The face place on some NuTone Intercom Master Stations are thicker than others, the IM3003 has a fairly thick face plate so when the Audio Jack is placed thorugh the hole there aren't enough threads showing to screw on the locking ring.
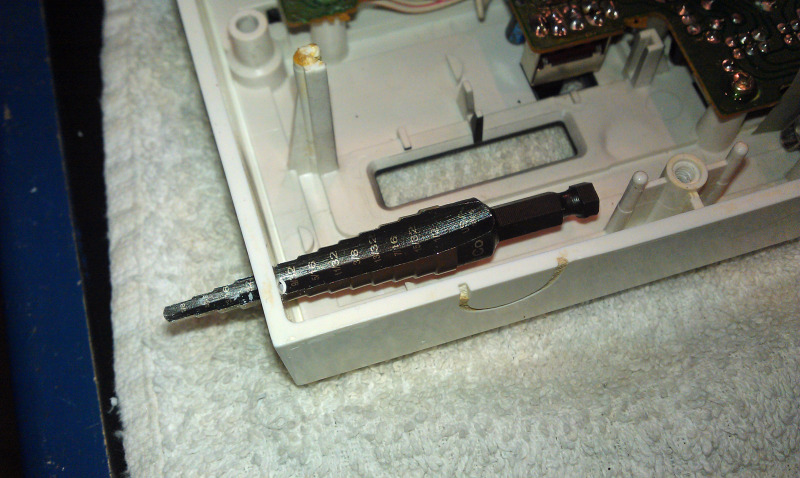
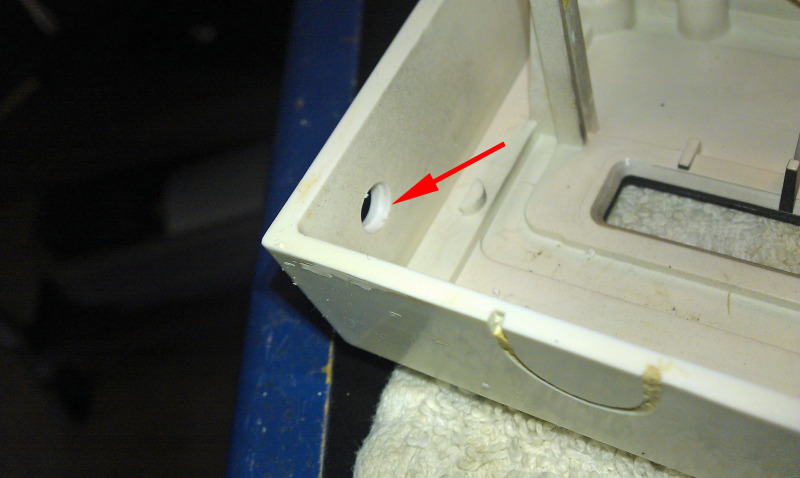
The inside of the hole will need to be chamfered, which will allow the body of the Audio Jack to sit flush up against the inside of the plastic face plate.
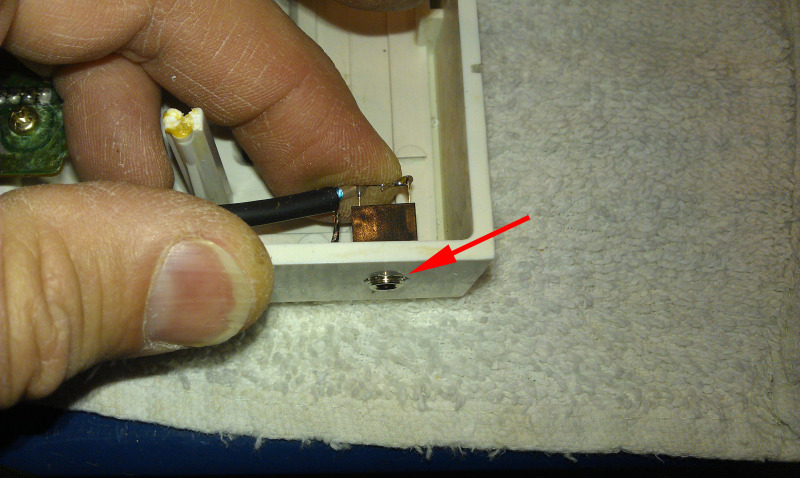
Now there are plenty of threads for the locking ring. Mount the Audio Jack to the face plate, reinstall the Tuner Board and replace its mounting bracket and screw.
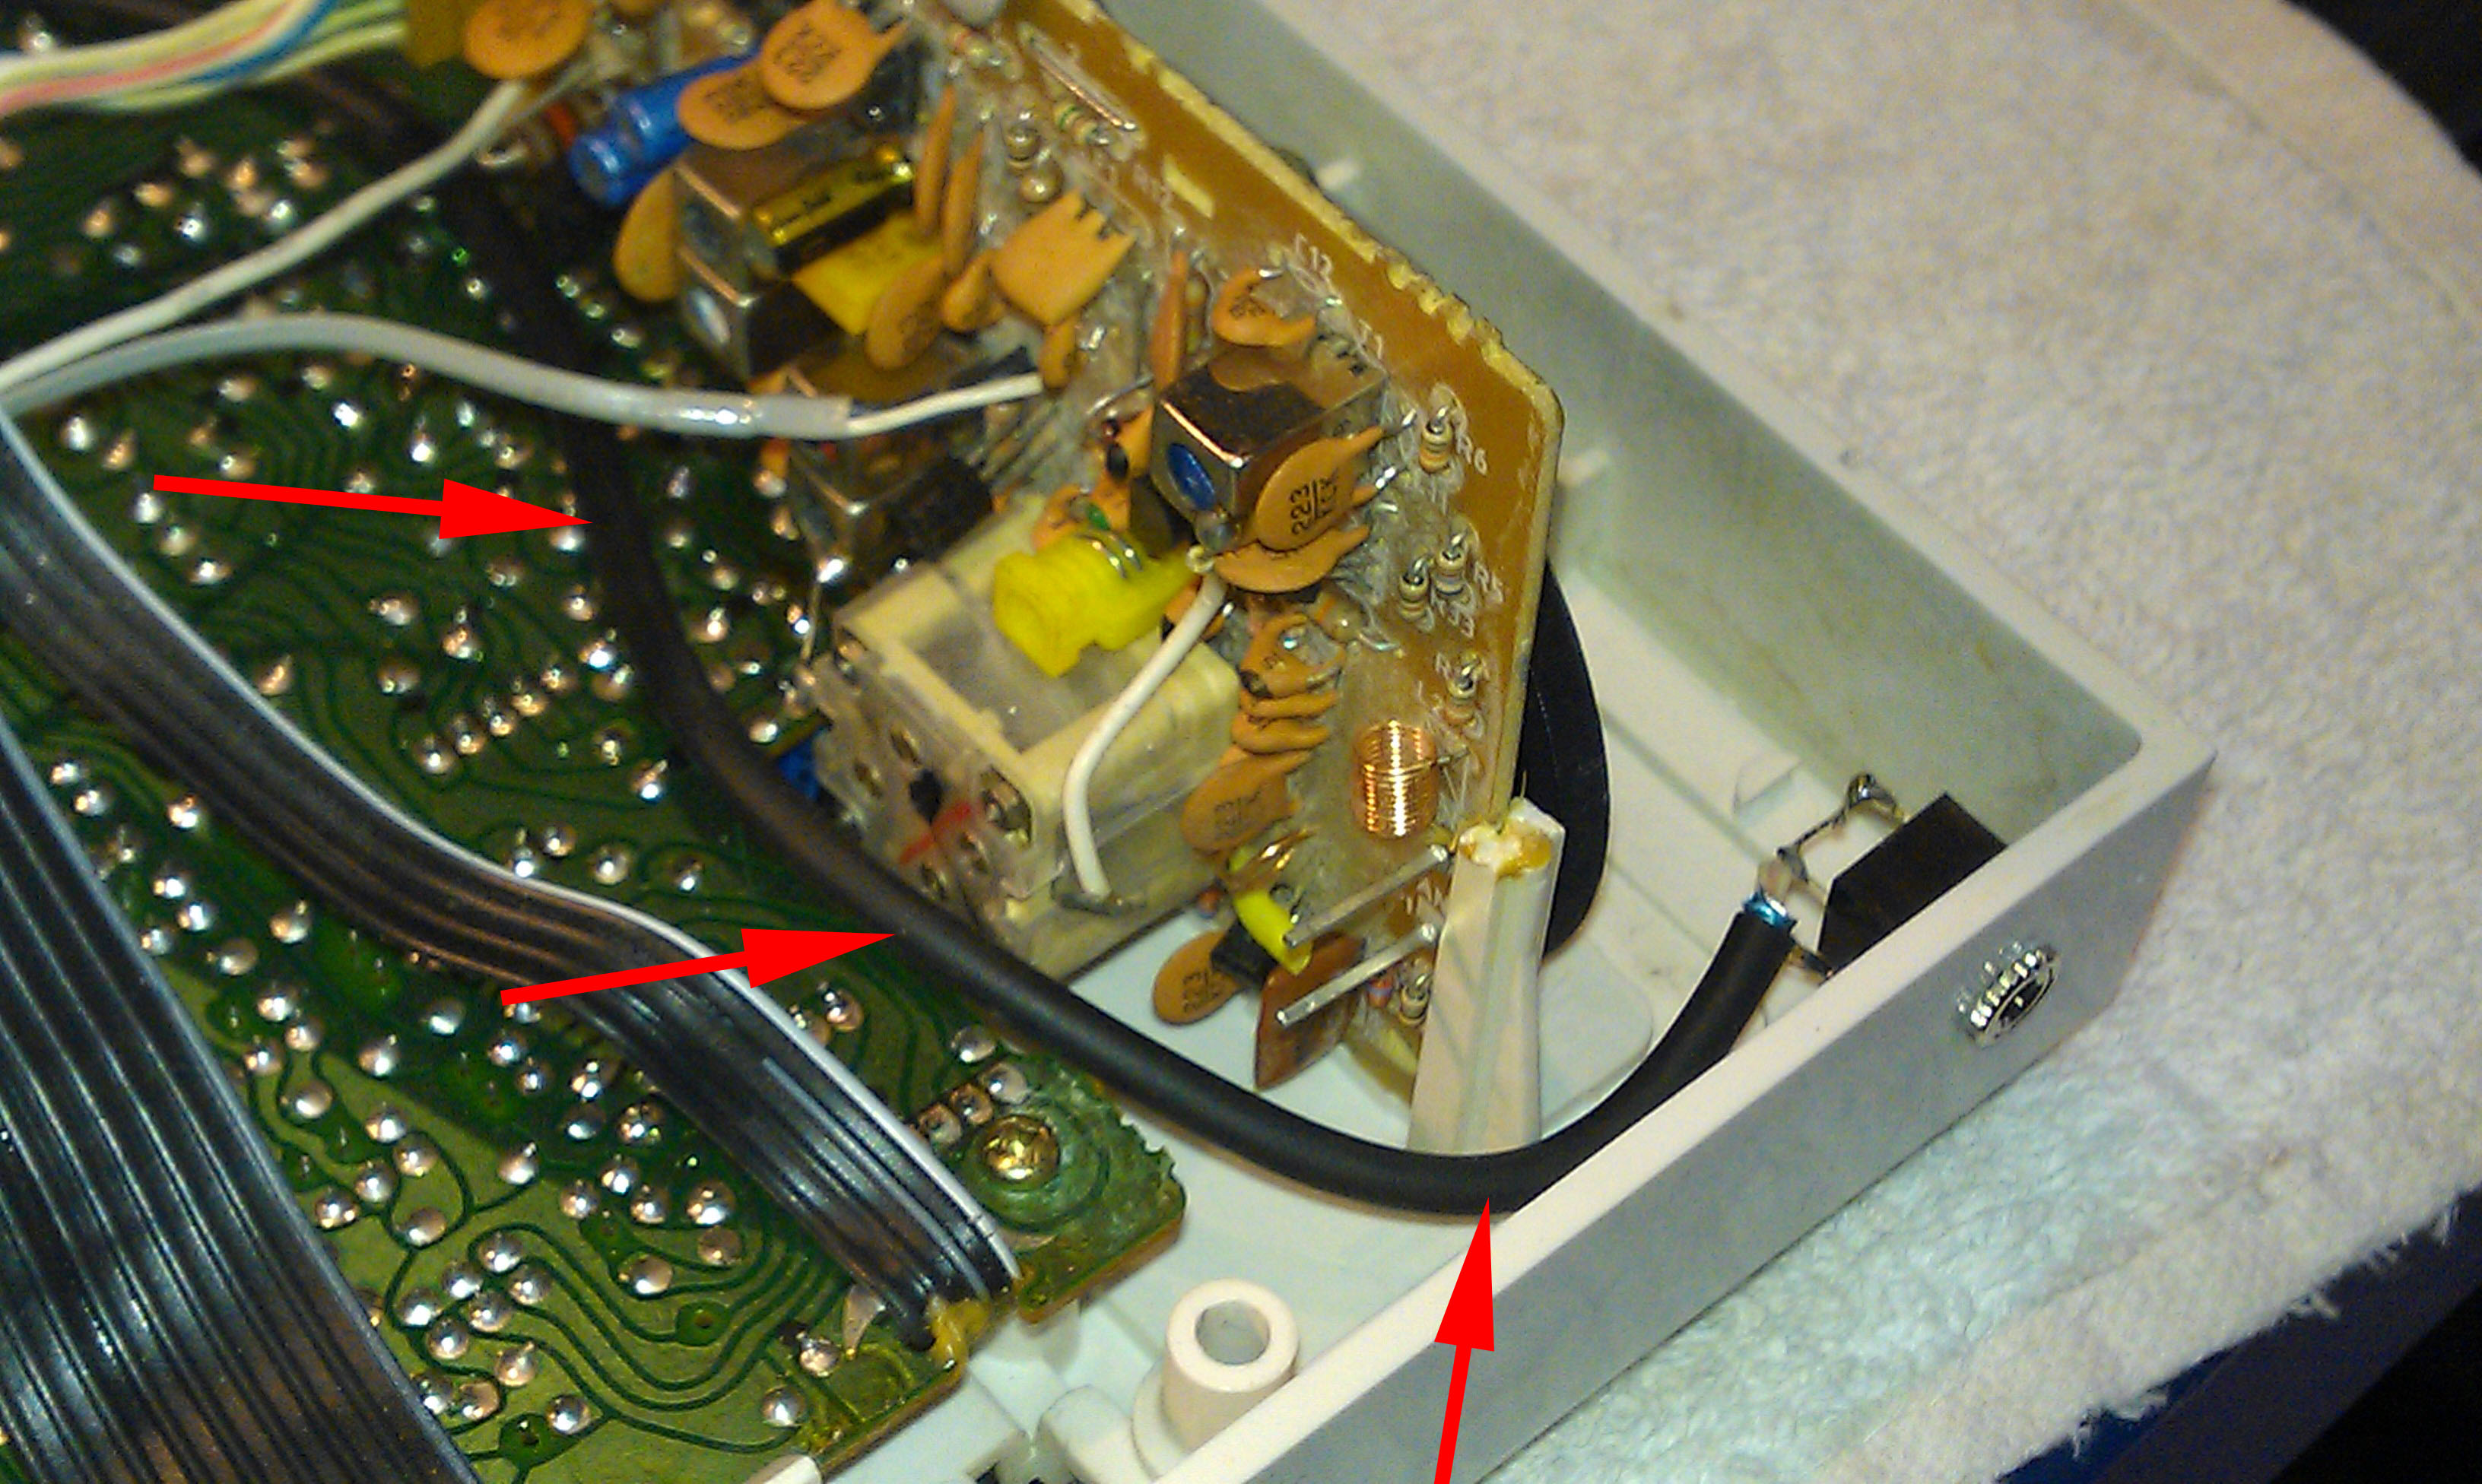
Route the Audio Cable around the top of the Tuner.
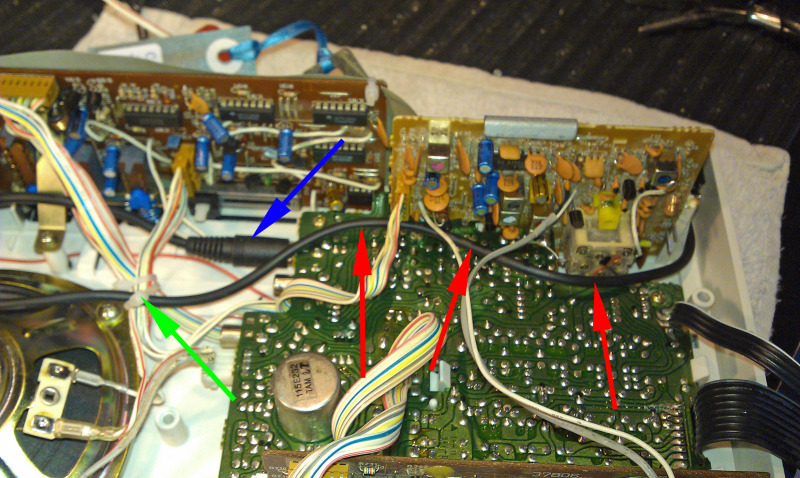
Loop the audio cable through the interconnection cables of the IM3003 and plug the RCA connector into the TAPE input jack (not the PHONO jack)
I usally use a wire tie to secure the audio cable as it loops throughthe Master Station.
 Cindy & Christopher
Adding An External Audio Input Jack to your NuTone Radio Intercom Master Station
Here's our newest Video: It shows how to install a miniature Audio Input Jack on a NuTone Radio Intercom Master Station.
We now also have a "do-it-yourself" kit available. The kit includes the pre-made Audio Jack/Cable assembly and the Stepped Drill Bit. The Drill Bit is "loaned out" with the kit and we include a Postage Paid Return Label so you can send the Drill Bit back to us when your done.
Please call our office to order the Kit.
925-743-8236
 Cindy & Christopher
Adding a Bluetooth Receiver to a NuTone Radio Intercom Master Station
Now that you have added an external Audio Jack to your NuTone Intercom Master Station, you need to connect your external music source to it.
You can simply use a standard 1/8" (3.5mm) Stereo to Stereo audio cable, which plugs into the external Audio Jack and your music source. Or, you can do something that's quite a bit cooler - add a Bluetooth Receiver.
Bluetooth Receivers are vary common and easy to find - I bought the receiver I used in the Video on Amazon for about $16.00.
By using a Bluetooth Receiver, you don't have a cable hanging out of your NuTone Master Station and you don't have to worry about when to place your external audio source (CD, smart phone, iPod) all you have to do is pair your Bluetooth enabled device to the Receiver.
Here's a Video that shows how to do this after you have added the external Audio Jack to your NuTone Master Station.
 Cindy & Christopher
Adding an External Audio Jack on Pre 1975 NuTone Intercom Master Stations
Our Videos about adding an External Audio jack and using a BlueTooth receiver with your NuTone Radio Intercom Master Stations are very popular and I've had people contact me about how to add this feature on early NuTone Master Stations, like the 2090 / 2092, 2540 / 2541 and N2561 / N2562.
In this Video I cover the basics of how these early models already have an RCA input jack that is accessible from the outside of the Master Station and how you can reposition the RCA JAck for an internal connection.
You can contact us directly to order your External Audio Jack Assembly by calling our office 925-743-8236
 Cindy & Christopher
Did we Start Something with our External Audio Jacks?
Our first post about these External Audio Jacks was way back in 2013. Since then, there are more sellers of this specialized item and recently I had the occasion to inspect one of these "other" audio jack assemblies.
While this "other" audio jack wasn't terrible - it did have a fatal flaw that would make the sound from an external audio source sound wrong.
Watch this Video and learn what to watch out for when either buying or making your own External Audio Jack Assembly
Chris

Reader Comments (3)
Dear Chris:
Does this work with the N2561 ? Will this convert the N2561 from Mono to Stereo ? Is there any possible way to make the N2561 play in stereo ?
Thanks indeed.
Hi Louis,
Yes adding an auxiliary audio jack will work with your 2561. No, it does not turn the system into a stereo system.
A stereo system requires 2 amplifier and 2 speakers in each location (right and left channels)
Since most external audio sources are stereo, the input jack has to be constructed as show to mix the right and left channel signals into a single channel (mono) before it is feed into the Master Station.
Thanks
Chris
I just wanted to thank you for your tutorial on how to add an auxiliary plug to the NuTone IMA-4006 setup. I bought a home last year with this intercom system and your tutorial was so easy to follow and helpful! Now I can listen to whatever music I like without upgrading to a $1K+ system or completely gutting it.
Thank you so much and I look forward to using your website further as a resource (and of course, if repairs are needed, to contact you for that -- though the system seems to be in fine working condition today).
Thank you,
Dan